
Varnishing Acrylic Paintings

Why Varnish your Paintings?
Not only does varnish protect your paintings it also brings out the colour and makes it look finished. So varnishing your painting is the perfect way to finish off your painting.
Types of Varnish
Gloss, Satin or Matt
Varnish comes in different types of finish; gloss, satin and matt. I often use a satin finish so it is still glossy but not quite as reflective. In modern ‘fluid art’ paintings I like gloss. The finish is a personal choice and does not effect the protection of the painting.
Liquid or Spray
Varnish comes either as a liquid or spray, this is a preference - if you choose a spray varnish make sure you are in a well ventilated space and wear a mask.
Acrylic or Solvent
You can varnish your acrylic paintings with either acrylic varnish or solvent varnish. Solvent varnish can be lifted (for cleaning) whereas acrylic varnish is permanent. It is wise to apply an isolation coat using an acrylic medium prior to applying the solvent varnish. I generally use an isolation coat to protect the layers and even the finish prior to varnishing.
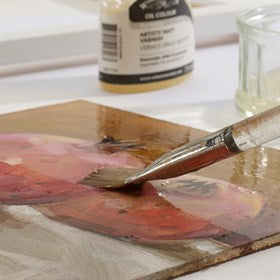
Applying Varnish
Below is a video which talks about and demonstrates how to apply liquid varnish. It can be daunting to apply coats of varnish over your finished painting but it will be fine as long as you consider a few things…here are Winsor and Newton's top ten tips from there 'all you need to know about varnishing' page...
Top ten tips when applying varnish
- Wait until your painting is completely dry.
- Choose a dust free area to work in, keeping windows and doors closed.
- Use a flat wide, soft, tightly packed varnishing bush such as the Winsor & Newton Monarch glazing and varnishing brush, keep it clean and use it only for varnishing.
- Keep the work to be varnished flat on a table or work surface – avoid working vertically.
- Stir the varnish well and pour it into a clean flat saucer or tin and load your brush. Wipe it on the side of the saucer so it is not dripping.
- Apply the varnish in 1 to 3 thin coats rather than one thick coat.
- Use long even strokes from top to bottom while moving from one side to the other, and remove any bubbles.
- Once you leave an area, avoid going back over areas that you have done. For those areas that you have missed, simply allow to dry completely and re-varnish.
- After you have finished, shield from dust with a protective plastic film (known as a ‘tent’).
- Leave to dry for 24 hours and if a second coat is required, apply at right angles to the first.
In the video below from the PainterInYou he uses a foam brush. I use a varnish brush (do not use them for anything else as you don’t want old paint to come out on the surface of your painting). You can choose either. I hope you enjoyed this video… comments welcome below or contact me with any queries.